Cable Tray Bend Types Explained: Complete Technical Guide
📋 Table of Contents
1. Why Proper Bends Matter
Cable tray bends are far more than simple direction changers. They are precision-engineered components that:
- Protect Cable Insulation: Proper radius prevents stress damage
- Maintain System Integrity: Provide smooth cable transitions
- Distribute Load Properly: Engineered to handle cable weight
- Ensure Safety: Eliminate sharp edges and stress points
- Allow Future Modifications: Easy to remove and replace
Using the wrong bend type or radius is one of the most common causes of cable failures in industrial installations. Combined with proper cable tray accessories, the right bends ensure your system performs reliably for decades.
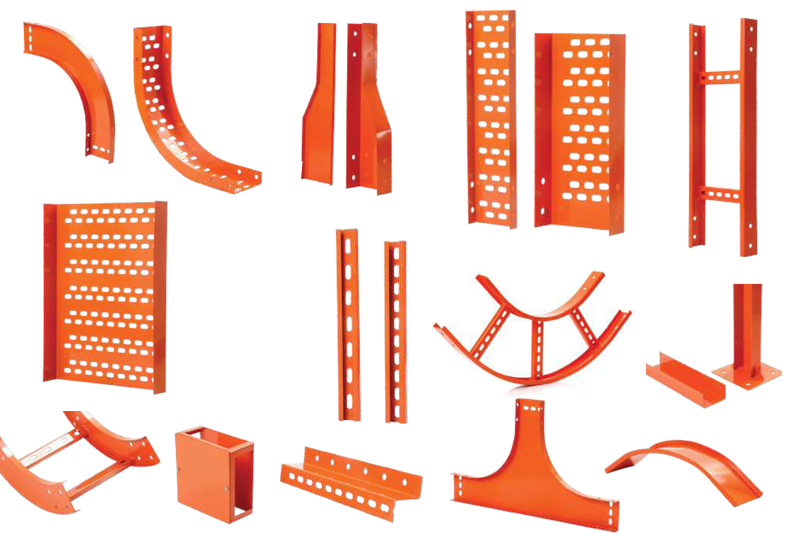
2. Cable Tray Bend Categories
| Bend Category | Direction Change | Common Uses |
|---|---|---|
| Horizontal Bends | Left/Right (same height) | Corner turns, route around obstacles |
| Vertical Inner Bends | Going UP from horizontal | Up to higher levels, ceiling routing |
| Vertical Outer Bends | Going DOWN from horizontal | Down to floor equipment |
| Tee Bends | Three-way branching | Branch circuits from main run |
| Cross Bends | Four-way intersection | Major distribution hubs |
| Reducer Bends | Size transitions | Width changes in tray runs |
3. Horizontal Bends
90° Horizontal Bend
The most commonly used bend, creating a right-angle turn in the cable run while maintaining the same elevation.
Specifications:
- Standard angles: 90° (most common)
- Internal radius options: 300mm, 450mm, 600mm, 900mm
- Compatible with all tray types and widths
- Material: Matching FRP grade as main tray
Applications: Building corners, equipment routing, around columns/obstacles, plant layout changes.
45° Horizontal Bend
Gentler turn used when 90° bend is too aggressive or to navigate around obstacles smoothly.
Specifications:
- Angle: 45° single bend
- Often used in pairs (two 45° bends create 90° offset)
- Lower cable stress than 90°
Applications: Smooth routing through complex spaces, when cable bend radius is critical.
Custom Angle Bends
Specialty bends for non-standard angles (30°, 60°, 120°) available on custom order for specific project requirements.
4. Vertical Bends - Inner & Outer
🔑 Critical Difference
Vertical Inner Bend: Used when going UP (cables curve on the inside)
Vertical Outer Bend: Used when going DOWN (cables curve on the outside)
The geometry is completely different - they are NOT interchangeable. Using the wrong type damages cables and creates safety issues.
Vertical Inner Bend
The bend's concave (inner) face is on the side where cables sit. Used when cable tray transitions from horizontal to going UP.
How to identify: When you look at the bend from the side, the curve "opens upward".
Applications:
- Cable risers in multi-story buildings
- Routing cables from floor level up to ceiling
- Transitions from underground to above-ground
- Going up to higher equipment levels
Vertical Outer Bend
The bend's convex (outer) face is on the side where cables sit. Used when cable tray transitions from horizontal to going DOWN.
How to identify: When you look at the bend from the side, the curve "opens downward".
Applications:
- Bringing cables down to floor equipment
- Cable drops to operational levels
- Routing cables down to motor control centers
- Distribution to ground-level equipment
Vertical Bends for Different Tray Types
- Ladder Type: Available in all radii, must accommodate cable bend radius
- Perforated: Similar to ladder, smoother cable transition
- Trough: Higher walls help retain cables during vertical transitions
- Channel: Lighter duty, used for light cabling vertical runs
5. Tee Bends
Horizontal Tee Bend
T-shaped junction creating three connection points on the same horizontal plane. The "stem" of the T is perpendicular to the main run.
Configurations:
- Equal Tee: All three sides same width
- Reducing Tee: Branch is smaller than main
- Custom Tee: Special widths on request
Applications: Branching cables to side equipment, parallel runs to multiple destinations, distribution from main feeder.
Vertical Tee Bend
Less common, creates a 3-way junction where one side goes vertical (up or down). Used in cable risers with horizontal branches.
6. Cross Bends
Horizontal Cross Bend
X or +-shaped junction creating four connection points on the same horizontal plane. Used at major cable distribution centers.
Configurations:
- Equal Cross: All four sides same width
- Reducing Cross: Different widths on different sides
Applications: Plant rooms, electrical substations, major distribution hubs, complex routing centers, data center main runs.
Note: Cross bends are less common - most installations can be designed using multiple tee bends instead.
7. Reducer Bends
Reducers transition between different tray widths in the same run.
| Reducer Type | Configuration | Best Use |
|---|---|---|
| Centered Reducer | Symmetric width reduction | Aesthetic appearance |
| Offset Reducer | Asymmetric width transition | Maintaining one straight edge |
| Vertical Inner Reducer | Width change while going up | Riser size adjustment |
| Vertical Outer Reducer | Width change while going down | Downward width reduction |
| Horizontal Reducer | Width change on flat plane | Most common reduction |
Common Reduction Scenarios
- Heavy main to medium branch: 600mm → 300mm
- Medium to small distribution: 300mm → 150mm
- Final equipment connection: 150mm → 100mm
8. Bend Radius Requirements
⚠️ Critical: Cable Bend Radius Rules
| Cable Type | Minimum Bend Radius |
|---|---|
| Power Cables (LV) | 8 × Cable Diameter |
| Power Cables (HV) | 12 × Cable Diameter |
| Control Cables | 6 × Cable Diameter |
| Fiber Optic | 12 × Cable Diameter |
| Coaxial Cables | 10 × Cable Diameter |
| Armored Cables | 12 × Cable Diameter |
The cable tray bend's INTERNAL radius must equal or exceed this value for the largest cable.
Selecting the Right Bend Radius
Example calculation:
For a 50mm diameter power cable (LV):
Minimum bend radius = 8 × 50mm = 400mm
Use cable tray bend with internal radius ≥ 450mm
9. Installation Best Practices
- Plan First: Map all direction changes during design
- Match Materials: Use same FRP grade as tray sections
- Use Couplers: Bend-to-tray connection via coupler plates
- Support Both Sides: Bracket support within 300mm of bend
- Verify Alignment: Check level and angle before final fastening
- Cable Pulling: Use proper cable rollers through bends
- Final Inspection: Confirm no cable damage at bend points
For complete installation procedures, see our ladder type installation guide.
10. Common Bend-Related Mistakes
❌ Top 7 Bend Installation Mistakes
- Wrong Bend Type: Using inner instead of outer or vice versa
- Insufficient Radius: Cable damage from tight bends
- Field-Fabricated Bends: Cutting trays to create bends (not recommended)
- Missing Supports Near Bends: Lack of support causing stress
- Mixing Materials: Using metal bends with FRP trays
- Improper Cable Routing: Cables on wrong side of bend
- Skipping Couplers: Direct bend-to-tray contact without proper plates
For more on common installation errors, see our common installation mistakes guide.
Need Quality Cable Tray Bends and Accessories?
Sharda Cable Trays manufactures the complete range of FRP cable tray bends - all types, all radii, all sizes. Engineered for performance, quality assured.
Get Quote View Bends & Accessories11. Frequently Asked Questions
Q1: What is the difference between horizontal and vertical cable tray bends?
Horizontal bends change cable tray direction on a flat plane (left/right turns) while keeping the same height. Vertical bends change the tray's elevation (up/down transitions). Vertical bends come in two types - inner bends (going up) and outer bends (going down) - each engineered differently.
Q2: What is a vertical inner bend vs outer bend?
A Vertical Inner Bend has the bend's concave side facing inward toward the cables, used when the cable tray transitions from horizontal to going UP. A Vertical Outer Bend has the convex side facing outward, used when the tray transitions from horizontal to going DOWN.
Q3: What bend radius should cable trays have?
Cable tray bend radius should accommodate the minimum bend radius of the largest cable being installed. Standard rule: minimum bend radius = 8x cable diameter for power cables, 12x for fiber optic. Common cable tray bend radii are 300mm, 450mm, 600mm, and 900mm internal radius.
Q4: When do I need a tee bend vs cross bend?
Use a Tee Bend (T-junction) when cable tray needs to branch in three directions. Use a Cross Bend (X or + junction) when four directions meet. Tees are more common; crosses are used at major distribution hubs.
Q5: Can I make cable tray bends on-site?
While theoretically possible, on-site fabricated bends are not recommended for FRP cable trays. Factory-made bends are engineered for proper radius, structural integrity, and aesthetics. On-site bends often have incorrect radius, weakened structure, and rough edges that can damage cables.
Q6: What standard angles are available for bends?
Standard cable tray bend angles are 90° (most common) and 45°. Other angles (30°, 60°, 120°) are available as custom orders. For non-standard turns, combining multiple bends (e.g., two 45° bends) creates 90° offsets.
Complete FRP Solutions from One Source
Trays, bends, accessories - everything from Sharda Cable Trays, Pune, India.
Send Enquiry 📞 +91 77750 95888