Cable Tray Installation Tools & Techniques: Practical Guide
📋 Table of Contents
1. Why Proper Installation Matters
🎯 Installation Impact
- Safety: Proper supports prevent failures and accidents
- Cable Protection: Correct technique prevents cable damage
- Performance: Good installation ensures system reliability
- Maintenance: Accessible installation eases servicing
- Longevity: Proper installation maximizes service life
- Compliance: Meets codes and standards
- Aesthetics: Professional appearance
✅ FRP Installation Advantage
FRP installs faster and easier than metal: light weight (no heavy lifting equipment), standard tools (no welding or specialized metalworking), easy field cutting and modification, no hot work permits needed, and less specialized labor required. This can reduce installation time by 30-50% compared to steel.
2. Tools Required
| Tool | Purpose |
|---|---|
| Circular saw (fine-tooth/diamond blade) | Clean cutting of trays |
| Hacksaw | Small cuts, field adjustments |
| Electric drill + bits | Drilling holes for fasteners |
| Measuring tape & marker | Measurement and marking |
| Spirit level / laser level | Ensuring level installation |
| Spanners/wrenches | Tightening fasteners |
| Torque wrench | Consistent fastener torque |
| File / sandpaper | Smoothing cut edges |
| Chalk line | Marking long straight runs |
| PPE (mask, gloves, glasses) | Safety during cutting |
⚠️ Safety: FRP Cutting
When cutting FRP, wear a dust mask, safety glasses, and gloves. FRP dust (glass fibers) should not be inhaled or contact skin/eyes. Cut in well-ventilated areas and clean up dust properly. Standard precautions make FRP cutting safe and straightforward.
3. Pre-Installation Planning
Review Drawings & Layout
Study routing drawings, identify support locations, note bends/fittings needed, and verify clearances. See our layout and routing guide for design principles.
Verify Materials
Check all trays, fittings, supports, and fasteners are on site and match specifications. Confirm correct FRP grade for the environment.
Mark Routes & Support Points
Use chalk lines and markers to lay out tray routes and support positions per the drawings and span requirements.
Coordinate Services
Confirm no clashes with HVAC, piping, or other services. Verify access for installation and future maintenance.
4. Installing Supports
Support Types
- Cantilever Brackets: Wall-mounted, common for single trays
- Trapeze Hangers: Suspended from ceiling using threaded rods
- Floor Stands: Floor-mounted stanchions for outdoor/floor routing
- Wall Brackets: Direct wall attachment
Support Installation Steps
- Mark support positions per span requirements (typically 1.5-3m)
- Install anchors/fasteners into structure
- Mount brackets/hangers
- Level all supports (critical for proper tray alignment)
- Add supports within 600mm of bends and joints
- Verify support capacity for the loaded tray weight
For support spacing details, see our sizing and load calculations guide.
🔧 FRP Support Note
FRP's light weight allows simpler, lighter support structures than steel. However, FRP is more flexible than metal, so follow manufacturer span tables carefully - don't exceed recommended support spacing to prevent excessive deflection.
5. Cutting FRP Trays
Measure & Mark
Measure required length, mark cut line clearly and squarely using a marker and square.
Wear PPE
Put on dust mask, safety glasses, and gloves before cutting. FRP dust requires protection.
Support & Cut
Support the tray firmly. Cut steadily along the line with a fine-tooth or diamond blade for clean edges.
Finish Edges
Smooth cut edges with file or sandpaper. In highly corrosive environments, apply resin/sealant to seal exposed fibers at cut edges.
💡 Cut Edge Sealing
In corrosive environments (chemical, marine, fertilizer), seal cut edges with compatible resin to protect exposed glass fibers. This maintains the full corrosion resistance of the FRP system. In benign environments, simple smoothing is usually sufficient.
6. Jointing & Coupling
Jointing Steps
- Align adjacent tray sections properly
- Position splice/coupler plate spanning the joint
- Insert bolts through pre-drilled holes
- Add washers and nuts
- Tighten to specified torque (don't over-tighten)
- Maintain expansion gaps where required
🔩 Fastener Selection
Use corrosion-resistant fasteners matching the environment - SS316 or FRP fasteners for corrosive areas, standard for benign. Avoid galvanic issues by matching fastener material appropriately. Don't over-tighten, which can stress FRP material.
Expansion Joints
For long runs and temperature-variable environments, install expansion joints (typically every 30-40m) to accommodate thermal movement. FRP has lower thermal expansion than metals but still requires consideration in long runs.
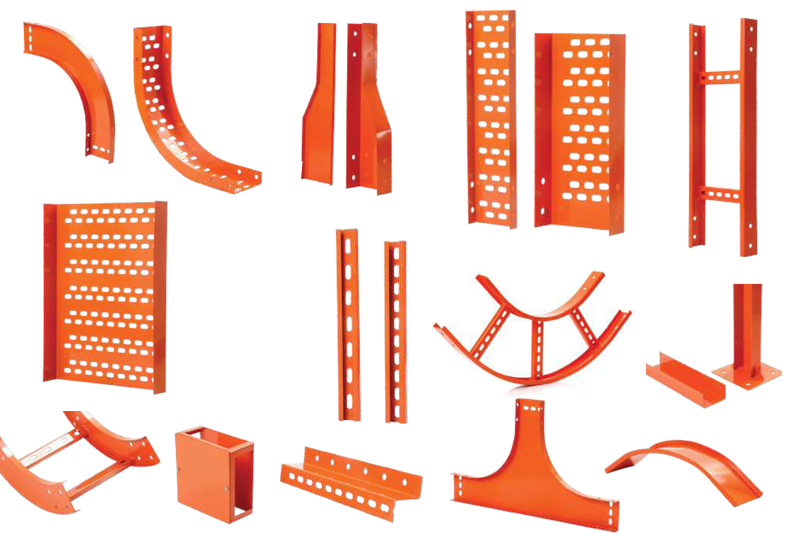
7. Installing Bends & Fittings
Fitting Installation
- Use manufactured bends/fittings for direction changes
- Match bend radius to cable requirements
- Support fittings adequately (within 600mm)
- Maintain alignment through transitions
- Use appropriate reducers for width changes
For bend types and selection, see our bend types guide.
⚠️ Bend Radius Critical
Ensure bends accommodate the bend radius of the most restrictive cable (especially fiber optic, which needs 10-20x diameter). Inadequate bend radius damages cables and degrades performance.
8. Cable Laying Techniques
📋 Cable Laying Best Practices
- Complete tray installation and inspection first
- Plan cable sequence (heaviest/largest first)
- Don't exceed fill limits (typically 40-50% for power)
- Maintain bend radius for all cables
- Use cable rollers for long pulls (reduce friction)
- Avoid dragging cables over tray edges
- Secure cables with ties/cleats (essential in vertical runs)
- Maintain power/signal segregation
- Leave slack for terminations and maintenance
- Label cables clearly
Cable Fill Guidelines
| Cable Type | Recommended Max Fill |
|---|---|
| Power cables | 40-50% |
| Control cables | 40% |
| Heat-sensitive | 30-40% |
| Data/fiber | Per manufacturer (allow expansion) |
⚠️ Avoid Overfilling
Overfilling causes heat buildup (reducing cable ampacity), prevents future additions, and makes maintenance difficult. Always plan for spare capacity (typically 50%) for future growth.
9. Inspection & Commissioning
Inspection Checklist
- ✓ All supports properly installed and leveled
- ✓ Support spacing per requirements
- ✓ All joints properly bolted and torqued
- ✓ Expansion joints provided where needed
- ✓ Bend radius adequate for cables
- ✓ Cut edges smoothed/sealed
- ✓ Earthing/bonding of metal accessories complete
- ✓ Cable fill within limits
- ✓ Cables properly secured
- ✓ Segregation maintained
- ✓ Labeling complete
- ✓ Clearances maintained
- ✓ No damage to trays or cables
For earthing requirements, see our earthing and grounding guide. Avoid common errors covered in our installation mistakes guide.
Installation Support & Quality Products
Sharda Cable Trays provides installation guidance, technical support, and quality FRP products that install faster and easier than metal. Get expert assistance for your installation project.
Get Installation Support View Products10. Frequently Asked Questions
Q1: What tools are needed to install FRP cable trays?
FRP can be installed with standard tools: circular saw or hacksaw with fine-tooth blade (cutting), electric drill with standard bits (holes), measuring tape and marker, spirit level, spanners/wrenches, torque wrench, files or sandpaper (edges), and PPE. No welding equipment or specialized metalworking tools needed, making FRP installation faster than metal.
Q2: How do you cut FRP cable trays?
FRP is cut using a circular saw with fine-tooth carbide or diamond blade for clean cuts, or a hacksaw for smaller jobs. Steps: measure and mark, wear PPE (dust mask, glasses, gloves), support the tray firmly, cut steadily along the line, smooth edges with file/sandpaper, and apply sealant to cut edges in highly corrosive environments. Cut in well-ventilated areas.
Q3: How are cable trays supported during installation?
Cable trays are supported using cantilever brackets (wall-mounted), trapeze hangers (suspended from ceiling via threaded rods), floor-mounted stands, and wall brackets. Support spacing follows manufacturer span tables - typically 1.5-3 meters. Supports must be installed first, properly leveled, and positioned within 600mm of direction changes and joints.
Q4: How do you join FRP cable tray sections?
FRP sections are joined using coupler/splice plates with bolts, nuts, and washers (SS316 or FRP fasteners for corrosion resistance). Steps: align sections, position splice plate, insert bolts through pre-drilled holes, add washers and nuts, tighten to specified torque (avoid over-tightening), maintain expansion gaps where required.
Q5: What are best practices for laying cables in trays?
Best practices: complete tray installation first, plan cable sequence (heaviest first), don't exceed fill limits (40-50% for power), maintain bend radius, use cable rollers for long pulls, avoid dragging over edges, secure with ties/cleats (especially vertical runs), maintain segregation, leave slack for terminations, and label clearly. Avoid overfilling.
Q6: How long does cable tray installation take?
Installation time depends on scale, complexity, and access. FRP installs faster than metal due to light weight and standard tools. A typical crew can install 50-150 meters per day in straightforward runs, less in congested areas. FRP's lightweight nature can reduce installation time by 30-50% compared to steel. Planning and pre-fabrication improve speed.
Professional Installation Made Easy
FRP installs faster - standard tools, no welding, less labor. Expert support every step.
Send Enquiry 📞 +91 77750 95888